Notifications
The Mirador system has been built with many alert mechanisms in place, to provide maximum visibility into the needs of the system for your entire team. LED lights provide on-the-ground reminders of battery and liquid status, alongside persistent monitoring capabilities in-app and via email.
Jump to:
Ticket Updates
If you’ve submitted a ticket through our Help Center portal and/or via email, you will also receive email updates on the status of that ticket. These emails will be sent from catchall@miradorhealth.odoo.com.
Alert Types
Type | Description |
|---|---|
Low liquid status | When the liquid status for a dispenser hits low volume it’s time to arrange refills. |
Critical liquid status | When the liquid status for a dispenser hits critical volume the dispenser should be refilled as soon as possible. |
Low battery status | When the dispenser begins sending low power indicators, it could be time to arrange replacements. |
Critical battery status | When the dispenser sends multiple, consistent low power indicators it means that battery failure is imminent, and the batteries should be replaced as soon as possible. |
Tags approaching expiration | When a tag is approaching end-of-life it must be replaced. Notifications will be sent via email 90 days prior and up to expiration date to provide time to re-order and assign new tags. |
Offline Report Generation | When a report export is too large to generate immediately, it is queued to process in the background. An email with a download link will be generated when the report is ready. |
In-App & Email Alerts
Alerts are visible for both Admins and Supervisors within Insights. Click the Notifications (bell) icon in the top-right corner to view alerts that have been issued within the last 7 days.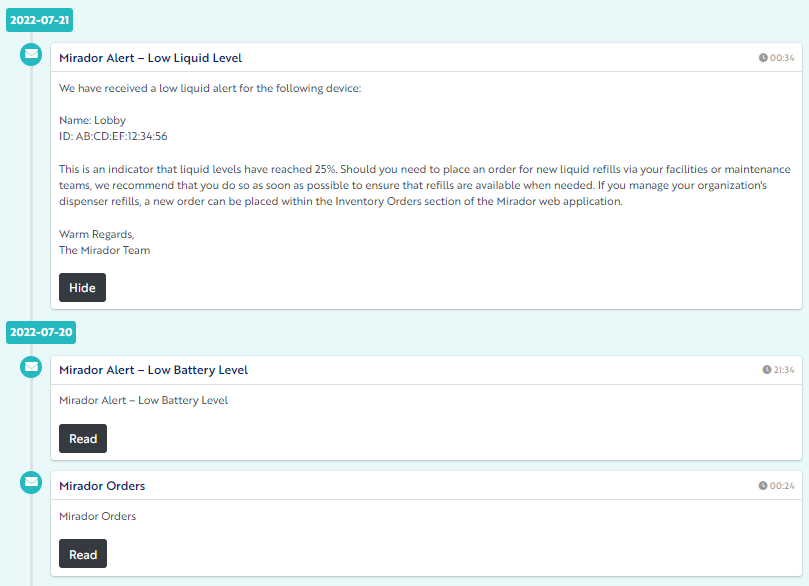
Users can also opt-in to receive copies of Organization alerts via email. These emails will be sent from donotreply@miradorhealth.com. Email notifications are set to “Opt-Out” by default, so as not to clutter user inboxes. Opt-out does not apply to universal/required notifications, such as:
- welcome emails
- password resets
- asynchronous reports, etc.
Each user can opt-in to applicable email categories as desired to receive a copy of in-app alert(s) via email. Opt-in preferences are managed by each user, within that user’s Profile settings.
Allowing (Whitelisting) Email Addresses
Whitelisting an email address tells your email system that the sender - that’s us! - is approved, and that you want to receive emails from us. This ensures that your system recognizes us as a verified sender, versus spam or something more malicious.
For reference, here are our teams' confirmed Mirador email addresses:
- donotreply@miradorhealth.com - Notifications
- catchall@miradorhealth.odoo.com - Ticket Autoreplies
- support@miradorhealth.odoo.com - Support
- accounting@miradorhealth.com - Billing & Accounting
- info@miradorhealth.com - Sales
Whitelisting steps vary depending on your service provider but, no matter which service provider you use, understanding whitelisting will benefit you. Whitelisting goes by many names - Junk, Spam and Safe Senders Lists are just a few. We have provided some examples below, though note that individual steps may vary depending on your application’s version, etc.
Outlook
To whitelist email domain or a specific address means adding it to a group called Safe Senders. If you’ve already received an email from us and it’s in your junk inbox, here’s a few ways to update your settings:
- Outlook inbox on a desktop
- Right-click on the email in your spam folder that you want to whitelist
- Hover over the Junk option in the drop-down menu
- Click Never Block Sender’s Domain. This will allow all emails from @miradorhealth.com to flow to your inbox
- Outlook inbox on mobile apps
- Open a message from a sender you want to whitelist
- Tap on the three dots on the top
- Tap Move to Focused Inbox
- In the pop-up window, tap Always Move to save your decision
If you want to be proactive and allow a sender before any emails get lost, you can simply add an individual address to your Outlook Contacts. You can also allow an entire domain by adding it to your Safe Senders list, so that emails from any “@miradorhealth.com” and "@miradorhealth.odoo.com" address will come straight to your inbox.
- Outlook inbox on the web
- Click the Safe Senders tab in the Junk Email Options window
- Click the Add button
- Enter the email address or domain name you never want Outlook to treat as junk email
- Click on OK, and then click on OK again to save your changes
Gmail
- Gmail inbox on the web
- Click the Settings gear icon in the top-right corner, then select See all settings
- Navigate to the tab labeled Filters and Blocked Addresses to access information about your existing filters, and select Create a new filter
- To whitelist a single sender, type the entire address. On the other hand, if you’re trying to whitelist every sender from a certain domain, type the domain alone, such as “@yahoo.com.” This will set Gmail spam settings to approve every message from a Yahoo sender.
- Enter the emails or domains you want to add to the Gmail whitelist into the From section
- Click Create Filter to confirm
- Put a mark next to Never send it to Spam to add this address to the Gmail safe sender list
- Click Create Filter again to save settings
- Gmail inbox on mobile apps
- Navigate to the Spam or Junk folder
- Tap on the message you wish to view
- Tap the Report Not Spam button
Apple Mail
- Apple mail on the web and desktop
- Go to Mail in the menu bar and click Preferences
- In the Preferences window, click on the Junk Mail tab
- Select the Allow Mail from option
- Enter the email address or domain you want to whitelist in the provided field
- Click on the + button to add it to your whitelist
- Click OK to save your changes
- iPhone Mail on mobile apps
- Navigate to the Mailboxes screen
- Scroll down to the folders area and select the Junk folder
- Find the email you wish to view and slide it left to see options
- Tap the More button
- Tap the Mark button and then Mark as Not Junk button
Reach out to your facility’s IT Administrator should you have additional questions or if none of the above steps resolved your issue, as this is not something Mirador Support can apply on your behalf.
Account Level Policies
All of the steps above are helpful for you to manage your own personal inbox. Your IT Administrator can also apply a top-level permission for all users, so that the burden does not rest on each user to update their personal settings. Feel free to print and share this article with your Supervisors and IT Administrators if you’re submitting an internal request, so that they have all of our team email aliases and domain information available during policy provisioning.