Connecting a Mirador Guardian™ Dispenser
To build your Mirador Guardian™ dispenser network you must to connect, or provision, each dispenser to your Wi-Fi network. This is how data transmits to/from the cloud and dispenser unit.
The instructions below are provided for visibility and urgent need, but are not required client-facing steps for Onboarding. Mirador’s Implementation team will connect all applicable dispensers during Onboarding, prior to installation.
Mirador uses a third-party app called Renesas Wi-Fi Provisioning to recognize your dispenser and connect it to your Wi-Fi network for the first time. It is important to note that this app is only required the first time your device is set up, or after a hard reset. Once your dispenser is connected to your Wi-Fi network, you will no longer need the Renesas Wi-Fi Provisioning app to configure your dispenser or update your SSID and password.
To provision a dispenser, you’ll need to know your dispenser model and software version. You’ll also need an Apple (iPhone) or Android device that can download apps from its app store, and access to the internet/Wi-Fi from that device.
Jump to:
Find your Guardian™ Details
As mentioned above, all initial provisioning (initial meaning the very first time a dispenser is provisioned on your network) is completed by our Implementations team during installation. Therefore, any dispenser you are working on currently will have a software version presented in the application. To find the software version:
- Log into the Insights application
- Navigate to Management >> Dispensers
- Search for the Group or Dispenser name to locate the dispenser you are provisioning
- Identify the Model and the Firmware Version associated with the dispenser

Make note of this, as the model + current software version determines the channel used for provisioning:
- Bluetooth provisioning (DA16600) is required for all Guardian™ dispensers on version 2.7 or higher.
- Wi-Fi provisioning (DA16200) is required for all Guardian™ dispensers on version 2.6 or lower.
Choose a Provisioning Path
Follow the instructions below to download the app and complete the provisioning process. Click through the path for Bluetooth or Wi-Fi depending on the software version identified above.
Jump to:
Enabling Your Dispenser
Once your dispenser is provisioned on your Wi-Fi network, the next step is to connect it to Mirador Insights. The following will walk you through the steps for approving new dispensers in your Insights instance.
- Navigate to Insights, the Mirador web application (admin.miradorhealth.com) and log in with your secure credentials

- From the top navigation bar, select Management >> Dispensers
- On the Dispensers page, locate your dispenser by searching the serial number, scanning the ID on the dispenser using a QR scanner, or typing in the name
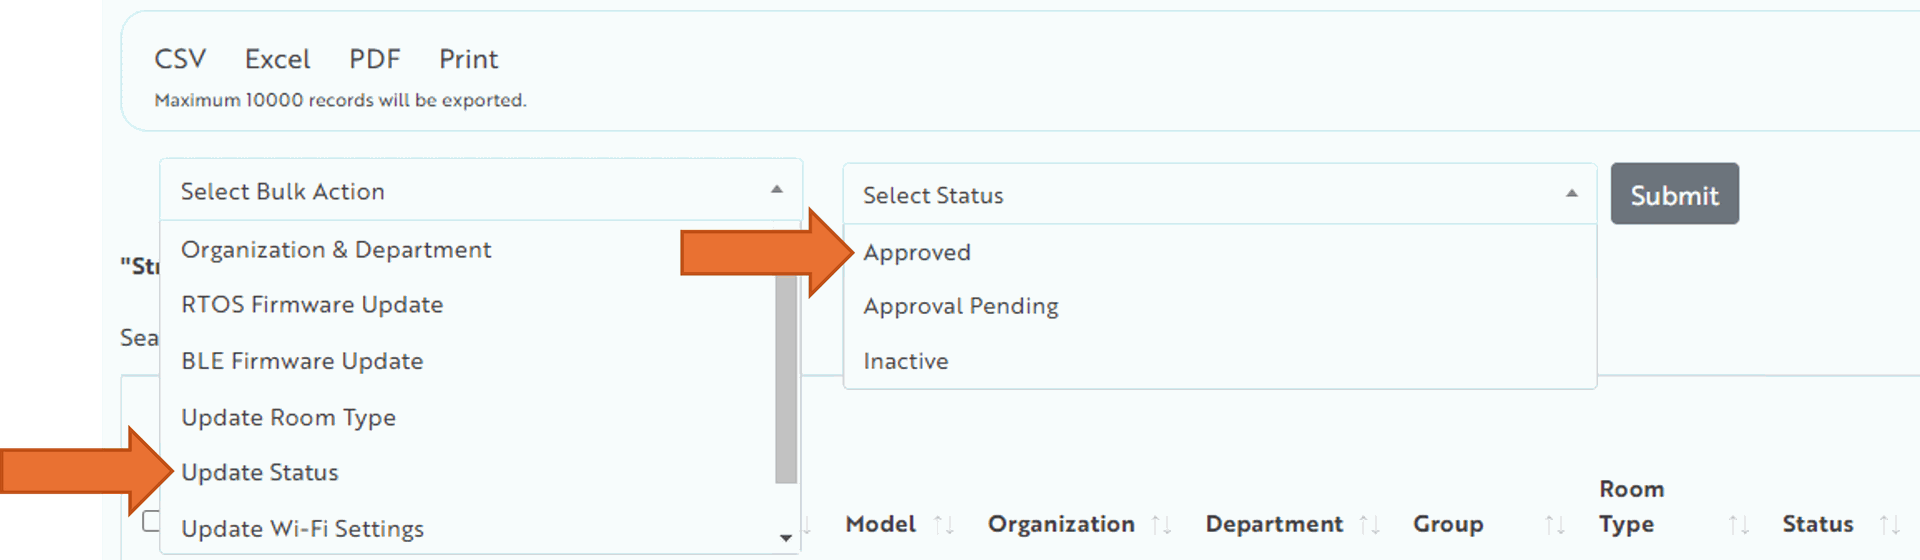
- New dispensers will show as “Approval Pending” in the Status column. Select the check box next to the new device(s) you would like to approve

Choose Update Status from the Bulk Actions menu
- Choose Approved from the Select Status menu
- Click Submit
That’s it! Your new dispenser is provisioned for your Wi-Fi network and is connected to Insights. As a final step we recommend pushing any applicable updates to dispenser configuration, such as Room Types either individually or through bulk actions once all your dispensers are online. Instructions can be found in the Dispensers section of the Insights Guide.
Notes:
- For security purposes, Insights will see your dispenser once it’s connected to the Wi-Fi network but will not send or receive any data alerts until the device has been manually marked as Approved.
- Please see Maintaining a Mirador Guardian™ Dispenser for additional use details.
SSID and Wi-Fi Password Changes
Once the initial provisioning and approval is completed, your Mirador administrator will be responsible for pushing password updates through the network.
- Administrators can add new or change the existing Wi-Fi SSID(s) and password(s) from within Insights on the Organization Wi-Fi settings page.
- An admin can then choose when to send the new password to the dispensers in the network either individually or through bulk actions via Edit Dispenser Details.
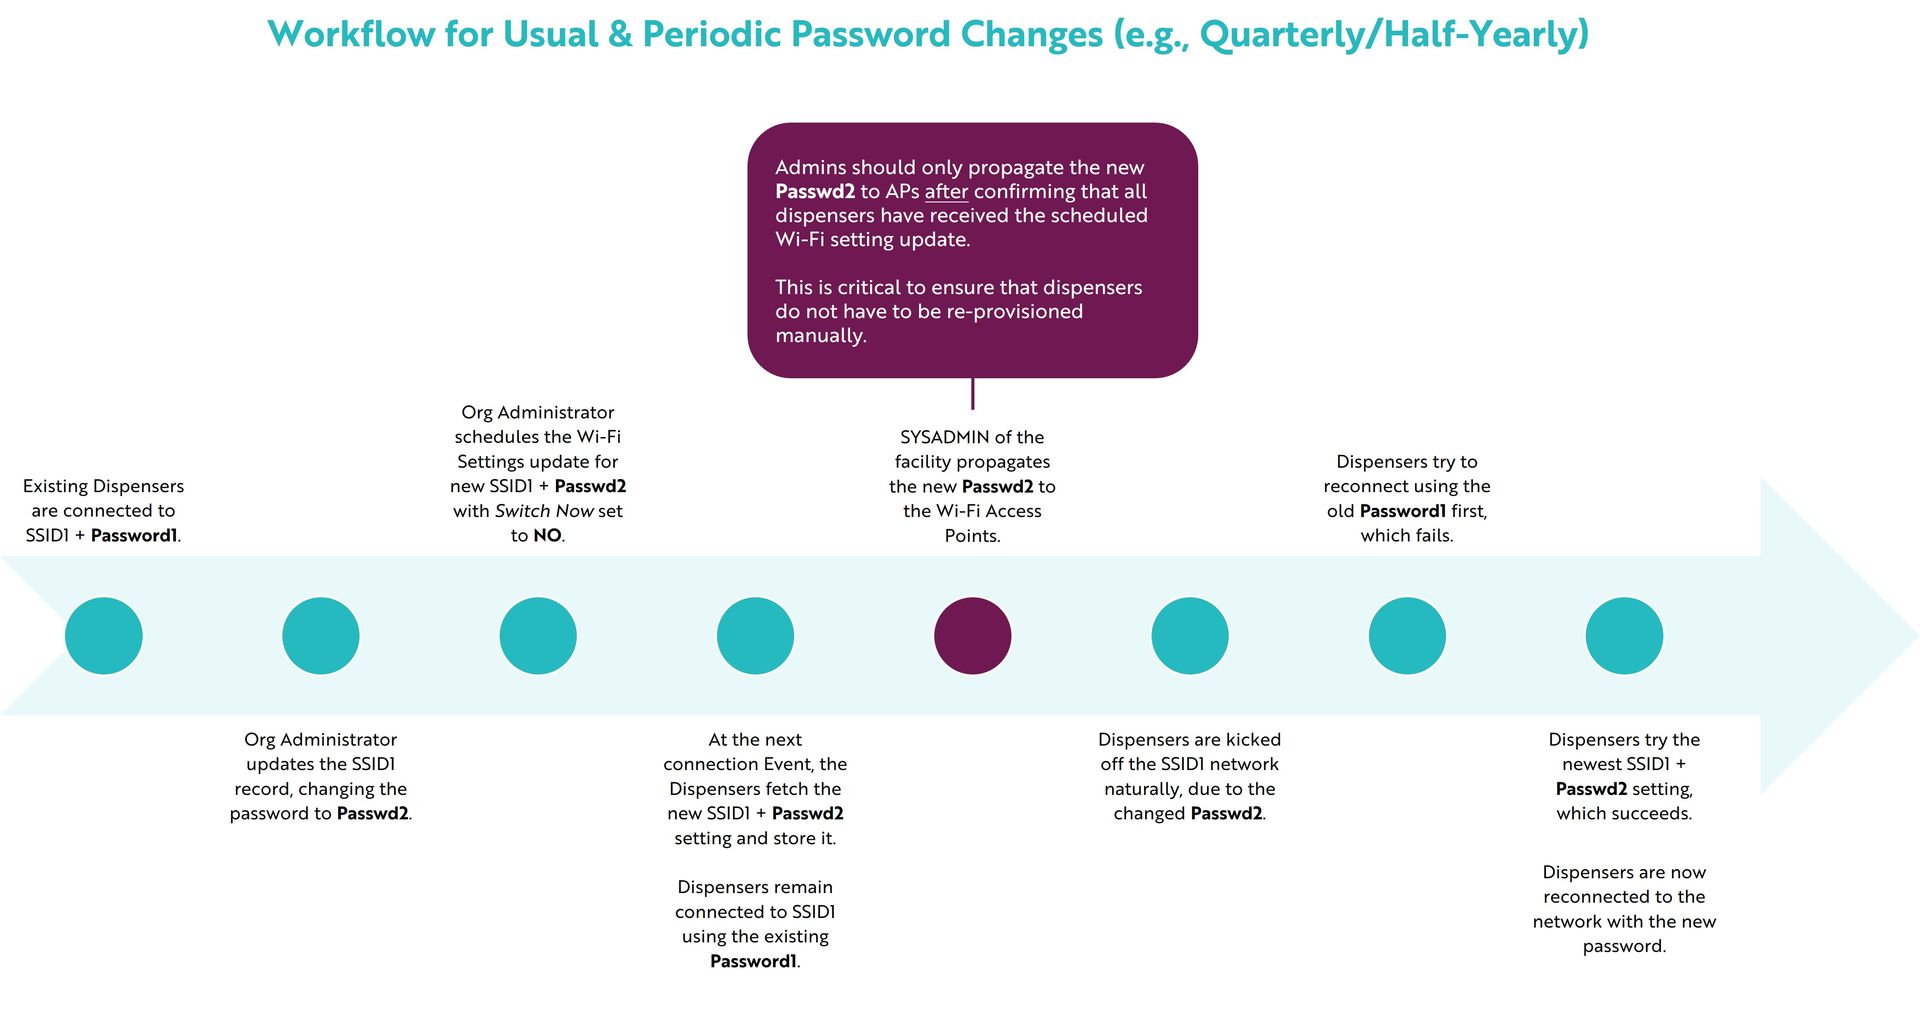
We have provided a printable workflow for periodic password changes here. See Organization Wi-Fi Settings for full details on management, maintenance, and password update processes.